

And with this big event comes the loaded series of choices regarding the toothfairy. Given a certain girl's love of fairies there was no way the ritual lie (and happy imagination fodder) wasn't going to continue. The big question was "So, how much does the tooth fairy leave these days?" My husband voted for a quarter based on his childhood memory (and the fact that it used to buy him a bag of chips and a drink). I told him he was getting old and overruled with $5 - (and yes, I did actually google the phrase "how much does tooth fairy pay" and consensus seems to be in the $2-$5 range - and a parent who leaves iTunes gift cards).
Future playground discussion will either prove that I'm not keeping up with inflation or seriously overestimating the fairy reserves. I decided to leave myself some wiggle room by quickly whipping up a special pouch for the exchange of tooth and reward. The great thing about 6 is that the process is as exciting as the payout.

*I thought about taking pictures along the way for a tutorial, but then it would have taken more than the 15 minutes I had free and really this is such an easy peasy project. If you do want more detailed info though, just drop me a line.
I started with a rectangle of fabric approximately 8" x 5"and used 1/2" seams around the outside and a 1/4" seam for the drawstring top.
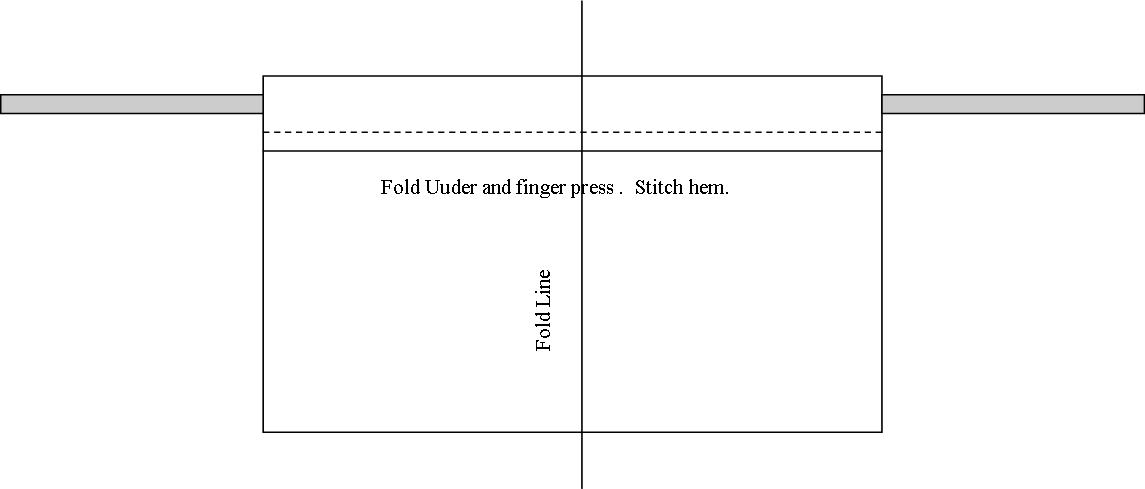
With wrong side of material facing you set ribbon or string in place. Fold material over ribbon/string leaving plenty of room for a hem stitch. Fold hem under, finger press and pin in place. Stitch straight hemline (I used a 1/4" seam) being careful not to stitch over ribbon or string. NOTE: You could also stitch without the ribbon/string in place and then draw it through aftewards - I'm just lazy and find it faster this way. Fold fabric in half with right sides together.
Stich an L shape (I used a 1/2" seam) to complete your pouch, leaving the string/ribbon opening unstitched so that you can cinch the pouch closed. I chose to go back around the edges with a zig zag stitch and to trim the corners with an angled snip just to make it cleaner. Turn pouch right-side out and you're ready for a visit from the fairy!

No comments:
Post a Comment